Showing posts with label My Creations. Show all posts

Friday, January 24, 2014

Valentine's Day White Chocolate Raspberry Cheesecake


While I was perusing Pinterest, I came across this beautiful white chocolate raspberry cheesecake with hearts swirled through the top. The original recipe can be found over at Jaclyn's blog Cooking Classy White Chocolate Raspberry Cheesecake (check out her blog not only for the recipe, but her pictures are much better than mine)I had to give this a try. I have to say her directions for the recipe are great and it really was quite painless to make such a beautiful dessert. I thought for my first try, it came out pretty close to Jaclyn's. The only thing I did differently, was that I made my own oreo crust because I could not find one at the store. It not only looks pretty but it tastes awesome! Definitely try this one for Valentine's Day or bring to a dinner party because it definitely has that "wow" factor.


Pin It

Saturday, January 4, 2014

How to Create a Seashell Wreath


I was searching through pinterest and came across a picture of a seashell wreath and decided I wanted to make two for the french doors in my house. The original post with great directions  can be find over on Cindy's blog at romantichome.blogspot.com How To Make a Seashell Wreath. While my boys were away at Nonnie camp this summer, I made them, and good thing I did it without them around. I am really pleased with how they turned out.


Cindy isn't kidding when she says you will need a lot of shells.
 This took a lot longer than I was expecting, but they were definitely worth the time. You do want to pay attention to how you are arranging the shells, so they all do not end up going in the same direction.


 To hang then from my french doors, I used  3M hooks and adhered them upside down on the backs of the doors, so the ribbons could hang off of them. I also used 3M Command picture hanging strips  to secure them to the doors. Tip: place the strips on the wooden grilles of the doors so you won't see them on the other side.

Pin It

Sunday, December 30, 2012

Bean's Monstrous Nightmares Dragon Costume

Have you ever heard of a vitamin B6 toxicity...? Me neither, 2 degrees later, and one being in nursing, I was always taught water soluble vitamins= excreted out in your urine. Yeah um not that simple, and let me tell you a MRI, a nerve conduction study- (just picture being poked with needles and shocked) and a bunch of other fun tests later, I can assure you a B6 toxicity is a genuine thing and it can make you feel miserable. I spent most of October having horrible nerve pain and so while I forced myself to still make Bean's awesome halloween costume, I didn't have time to blog about it, but I want to share with you all.

See Bean doesn't pick ordinary Halloween costumes. Two years ago, he announced to everyone how he wanted to be a blue poison dart frog. Yeah good luck finding that in the store. If you know Bean, you know he has the sweetest heart, and if I can avoid completely breaking it, I try not to. So, he was a blue poison dart frog two years ago, and Tadpole was a red eye tree frog.


The zoo employees thought he had the coolest costume ever.  So this year, I was prepared, and  asked way ahead of time(think August) what he wanted to be for Halloween. So when he told me he wanted to be a Monstrous Nightmares Dragon from How To Train Your Dragon, I had no idea how I was going to make it, but  I figured I had plenty of time. Then the worst year ever continued to be the worst Fall ever, and I was making this costume last minute as well. 

 However, I really love how it turned out.


 I also made Tadpole's costume and I am very thankful he goes for typical Halloween costumes, like ghosts. I added the googly eyes and the smile to his bandana hat because there was just too much of a KKK feeling going on there.

For Bean's costume I bought white leggings in Walmart and died them orange for the legs.


When the pants were orange, I then cut out circles from the awesome fabric I found at Joann's for the wings to make spots for the legs.  


I purchased a solid black hoodie from Wal-mart and then cut out tan felt for the front to make the belly of the dragon. I painted the stripes on with a bronze acrylic all purpose craft paint.

For the eyes, I cut styrofoam balls in half and drew the eyes onto the styrofoam and then painted them. I glued them to the top of the hoodie and that part was a little tricky so I stuck a plastic pumpkin in the hoodie so they would stay in the right place. 

The horns were where I thought I failed. I didn't know how I was going to make them, or make them stand up. I went through all of my supplies and half a bag of model magic and I love Crayola. light weight, easy to mold into any shape etc. I made them out of model magic, let them dry, painted them, then glued them and sewed them to the top of the hoodie. 
The wings were my favorite part. I had this awesome bronze and black shimmery fabric that I bought ON SALE. I free drew the wings on paper and used the paper as my pattern to cut the wings out of the fabric and then the most awesome stuff ever, Pellon fusible interfacing. It was just stiff enough to make perfect wings and the fabric could be ironed on on both sides!! 

I then used black flat elastic to make straps and there you have awesome dragon wings 


I attached teeth to the hoodie by cutting them out of felt and gluing them on. 


I used a pattern from a dinosaur costume for the tail and attached it to the back of the hoodie.
A very happy Bean on his way into school on Halloween.


Pin It

Wednesday, December 26, 2012

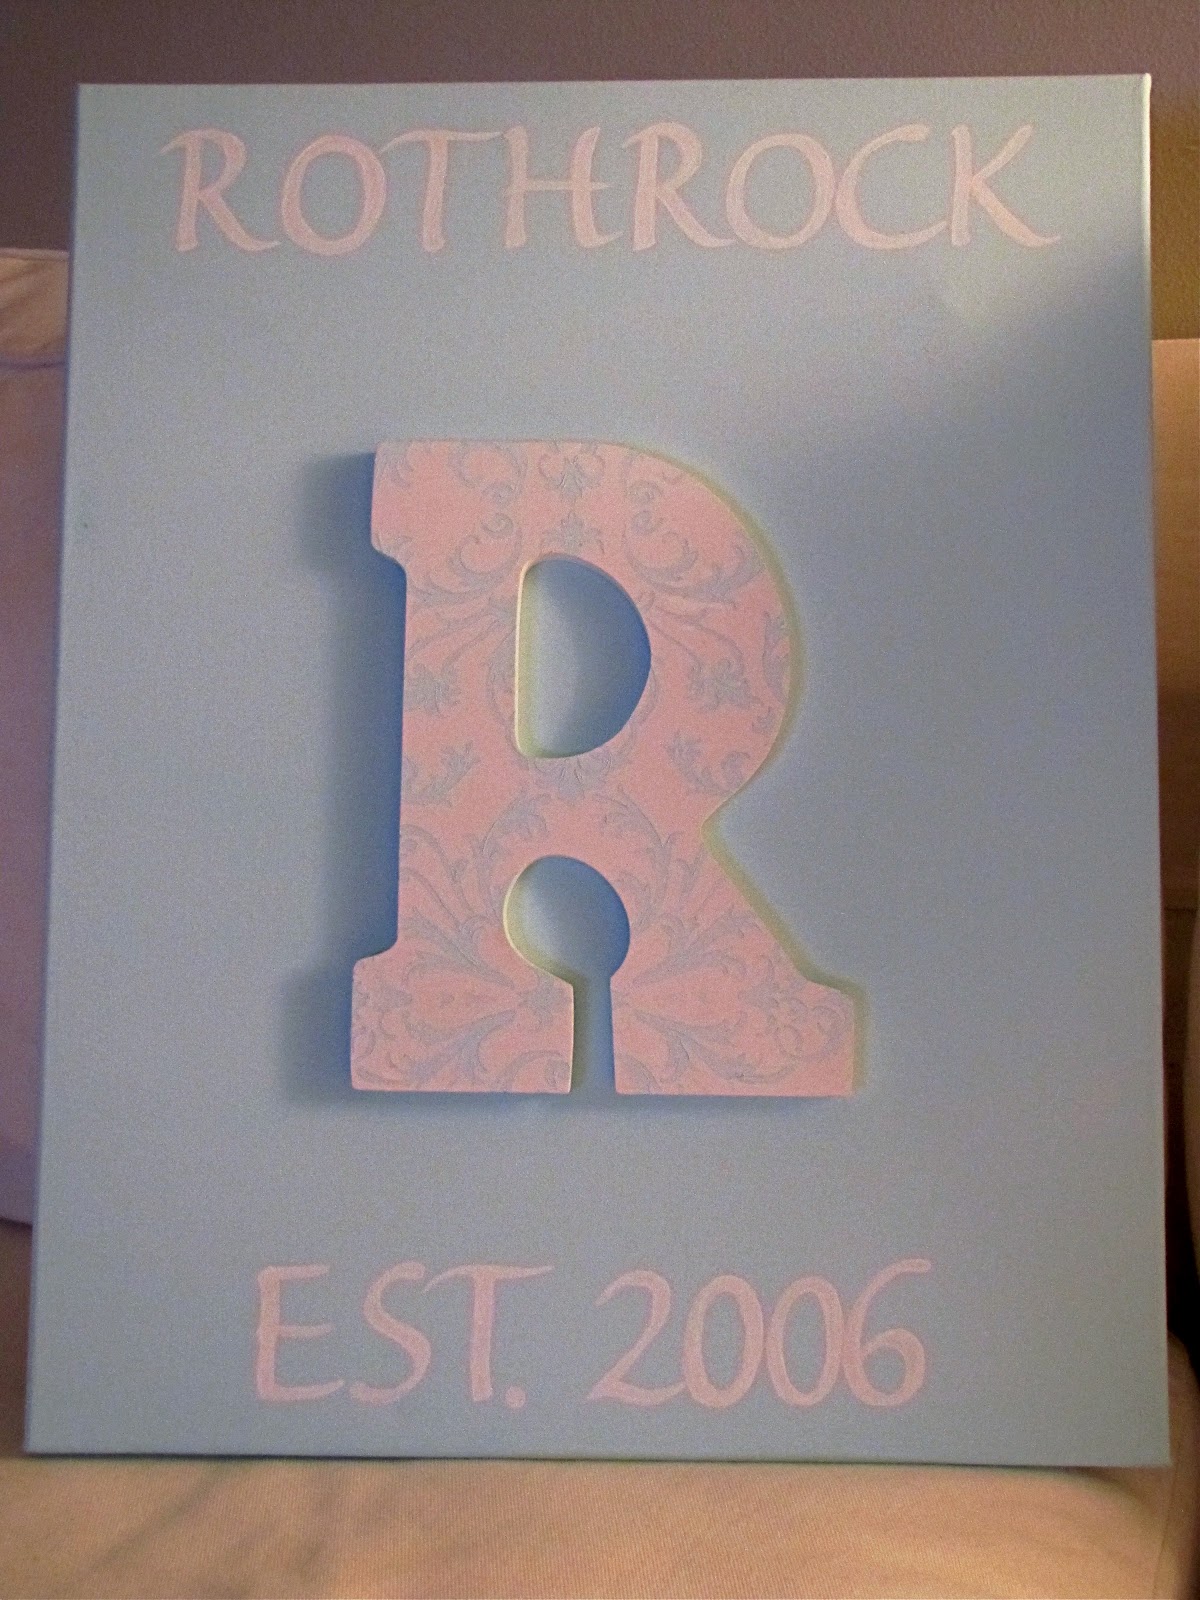
My Family Established Sign

Back in June, I blogged about some family established signs I made for wedding gifts for some friends (Family Established Signs ). I finally got around to making one for my family.  I painted the canvas a sea foam blue (my favorite color) and this time instead of stenciling the cavas, I stenciled the letter. 


I glued the R to the canvas and then stenciled our last name and the year Rock and I were married onto the canvas. Now it is hung right by our front door. So simple, so inexpensive to make, and I just love these signs. 


Pin It

Tuesday, December 25, 2012

DIY Beach Cottage "Snowmen"


I know I said I was going to post this several days ago, but then the entire family came down with the flu, and I have been too sick to post.  So pin this for next year if you want some awesome little beach "snowmen" for your house. 

 Here is how I made these awesome "snowmen" and everything I would do differently next time:

Supplies 
1. Round styrofoam balls 2 for each snowmen one larger than the other. I used a 10in round and a 7 in round for each. 
2. Spray adhesive- I would buy styrofoam spray adhesive next time.
3. Wooden dowels - I bought a 36in long dowel that was 5/8 inch thick and cut it for my two snowmen
4. Play sand- you can find this at home depot.
5. DecoArt Platercraft Acrylic Matte Spray Finish. 
6.Seashells, glass marbles, sticks, buckets, shovels, pinwheels, or anything else you want to decorate your snowmen with. 
7. Newspaper.
8. Foam board for the surfboard. One made out of wood would be best as I have to bring this one in every night. 
9. Tape- to make the white stripe down the surfboard.
10. Acrylic paint for surfboard.
11. Stencils for the words on the surfboard which you obviously don't need to do this project.
12.X-acto knife.

This is the tacky spray that I used to glue the two styrofoam balls together and to glue the sand to the styrofoam.  It got the job done, but next time I would try styrofoam spray. I would also put the dowel through both styrofoam balls so that the "snowmen" weren't as fragile. As for adhering the sand to the styrofoam, it took many layers of spraying adhesive and sprinkling sand. When I made the first one, I glued the styrofoam balls together before putting the sand on, for the second one, I covered them in sand and then attached them and that worked much better.  I then sprayed them with DecoArt Plastercraft acrylic matte spray finish to protect them against the elements. 

 The styrofoam balls attached to one another. I then sprayed the adhesive in small areas and poured sand over it. This took a long time. I also had to pat the sand down. You have to be patient with this. I am hopeful the styrofoam adhesive would work better. I almost gave up on this project at this point, but if you keep at it, it does work.
After they were dry, I took the wooden dowel and inserted into the bottom of the styrofoam ball to stake them into the ground. I would put this through both styrofoam balls next time. I also sharpened the end so they would stake into the ground easier. 

After they were put together, I staked them into the ground where I wanted them, surrounded them with newspaper and poured play sand on top of the newspaper around the snowmen. I then glued shells, and glass marbles onto them for eyes, noses, and buttons. I also found sticks for their arms and then added beach toys around them. 


For the surfboard, I drew the shape of a surfboard onto foam board and then cut it out with an X-acto knife.  The shape wasn't perfect, and it probably would be smartest to make this out of wood to hold up against the elements as I said earlier I had to take this in every night.


I placed tape down the center of the surfboard to create a white stripe, painted the surfboard red and then placed stencils on it with the words peace, believe, joy to create a Christmas surfboard.

and this is what the finished surfboard looked like.
Bean and I sick 


Pin It

Sunday, December 16, 2012

Beach Cottage Snowmen and Christmas in Florida

I have lived in South Florida for most of my life, but I still find the concept of wrapping palm trees with Christmas lights and covering lawns with deer, sleigh, and snowmen whilst wearing shorts, odd.  So, I decided this year to decorate my lawn  with beach cottage "snowmen."

They were looking a little bored, so this evening I decided to construct them a surfboard.

 I am not in the mood to write a long blog this evening,  so tomorrow I will post a tutorial on how I created them.

Friday was Bean's 6th birthday, on the inside I was fighting back tears as my heart was so heavy with grief after hearing of the tragedy at Sandy Hook Elementary, but like most Mom's I smiled and consumed myself in a 6 year old's  happiness and excitement. I've been pretty numb all weekend. As a mother of two small boys, what these children's parents are going through is unfathomable. Although there are no words that can ease their pain, I pray that that they feel the love, light, thoughts and prayers being sent to them from around the world. I am hopeful that what will remain in our hearts and what we  will focus on are these innocent children and brave women, their lives, and all the good that was brought into this world because of them.

 I made 20 luminaries in honor of these precious children and will put them out each night through Christmas. 

Pin It